Tips
How Easy Is It to Build Your Own Ice Rink?

For most of us hockey lovers, the obsession simply doesn’t end when you leave the rink. Most of us have dreamed about having a rink in our own backyard that would allow us to skate whenever we want, play pickup games with friends, and work on our skills without having to pay for expensive ice time.
For most of us, the thought of building our own backyard rink has also been too intimidating or overwhelming to get started. The thought of setting up and maintaining boards, ice, and everything that comes with it are often enough to deter hockey enthusiasts from going down the path of a backyard rink.
The thing is, setting up a backyard hockey rink is not nearly as difficult as it once was. Thanks to advancements in technology and product and process improvements, just about anyone can afford the supplies, time, and know-how needed to get it done.
Here’s a closer look at just how easy it is to build your own backyard ice rink in any climate or environment.
Part 1: The Boards
The boards are an essential part of any quality rink, as they help keep the puck in play and can also help simulate in-game situations, such as battling along the boards and dumping pucks deep behind the net.
D1 Backyard Rinks’ heavy-duty aluminum boards are handmade right here in St. Paul, MN, from the same dasher material you’ll find in a regulation ice rink, infused with a UV stabilizer to protect against the sun and discoloration over time. Our boards feature a blue caprail, white dasher face, and yellow kickplate, and because they’re made from heavy-duty aluminum, they play just like the real thing.
Tools Needed for Installation
There are a number of tools that will greatly help in the installation of our hockey boards.
- A wrench or drill will help tighten the bolts and nuts connecting the boards to one another.
- A cement drill helps with permanent installations where anchor plates are fastened to a concrete sub-surface.
- A metal mallet is used to drive the stakes into the ground for seasonal or portable rinks.
Preparing for Installation
Note: Rink setup is much easier with the help of one or two more people.
Depending on your rink size, it will arrive on one or more pallets. Remove the packaging and take inventory to ensure everything is included and nothing was damaged during transit.
Your hockey boards may be anchored via mounting, staking, weighting, or lagging.
Mounting the boards directly to any flat surface is typically done for indoor rinks where the boards need to be flush with a wall. Our boards are 3” deep, so we recommend using gold construction screws at least 5” in length (3” for the depth of the board and 2” to bite into the material you’re fastening to). Using one fastener near each of the four corners of the boards works great.
Our hockey boards can also be staked into the ground with D1 Kickers. These bolt to the top of the boards and come down to the ground at a 45-degree angle, resting 24” away from the backside of the boards. We recommend using at least 18” long x 3/8” diameter stakes for this installation method.
When mounting or staking is not an option, weighing the boards down with the D1 Base Kicker may be best. The Base Kicker attaches to the bottom of the hockey board and connects with the D1 Kicker up to 24” away from the backside of the board. This installation option is most common when penetrating the sub-surface is not an option. We recommend weighting with at least 50 lbs. for each tall board and 25 lbs. for each short board.
Lastly, we have the lagging option, wherein the boards may be secured with the D1 Anchor Plate (4” x 6”), which has two holes 3/8” in diameter and sits 12” behind the boards. We recommend lagging at least 2” into any hard flat surface, but no more than 1/2” from the bottom of the depth of the sub-surface. This is typically the best option for permanent installations.
Executing Installation
The first step in performing the actual installation is to lay out the hockey boards and their supports on the ground in the location where they’ll be installed. Place your first corner board on the highest point of the rink site and work around the planned rink perimeter until all hockey boards have been staged in position.
Next, we’ll begin connecting the boards using the provided bolts and nuts. Connect the Kicker, Base Kicker, and Anchor Plates as needed for your specific install. Instructions will vary but will be included and clearly communicated with your order delivery.
If you have any questions about your installation process or just want to make sure you get it right, an expert member of the D1 team is always ready and waiting to provide the assist.
Part 2: Ice for Any Season
Flooding your rink during the winter months is an ideal option for those in northern climates, but if you’re located in a warmer state or want to take advantage of your rink during the summer, synthetic ice is a great alternative.
Our D1 Glide Infused Pro Self Lubricated Synthetic Ice is durable, easy to set up, and simulates real skating in any environment. Because our glide solution is infused throughout every tile, there is no need for messy, short-lived surface coatings or lubricants. Simply install the synthetic ice tiles and begin skating immediately.
Build the Backyard Rink of Your Dreams with D1
Thousands of customers throughout the U.S. and Canada have trusted D1 Backyard Rinks to provide them with a superior hockey experience, including the homes of youth hockey players, commercial training facilities, and many NCAA and professional hockey teams. Our professional rink designers are here to recommend the best solution for your unique needs and environment, and is also available to ensure installation and maintenance are a breeze from start to finish.
Contact us today to learn more or check out our Rink Builder tool to start making your vision a reality.
Shipped to New Jersey
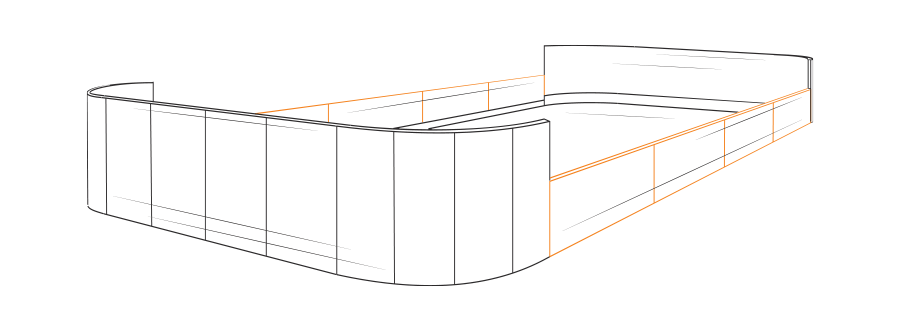
Combo Boards with
Synthetic Ice
Shipped to Grand Forks, ND
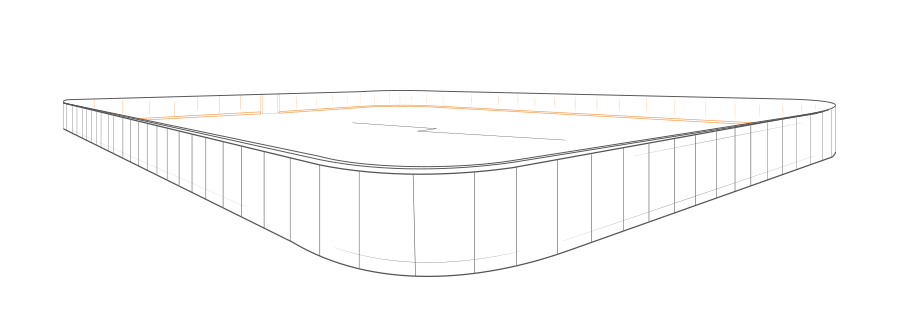
Outdoor Rink
With Tall Boards
Shipped to Twin Cities area, MN
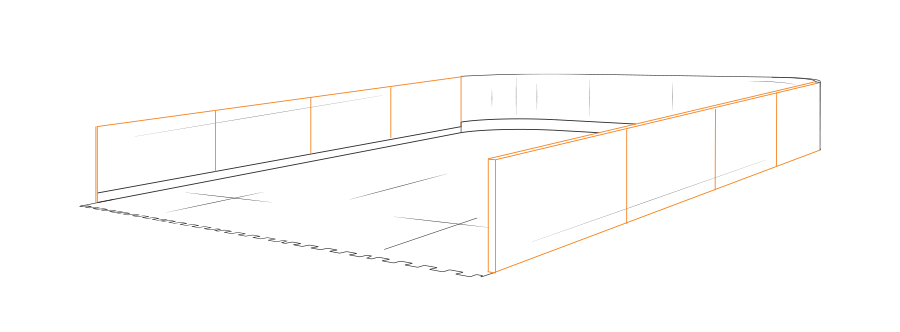
Shooting Lane
With Tall Boards & Synthetic Ice